



The technology of the future for garden paths: why lay a spiky membrane under paving stones?
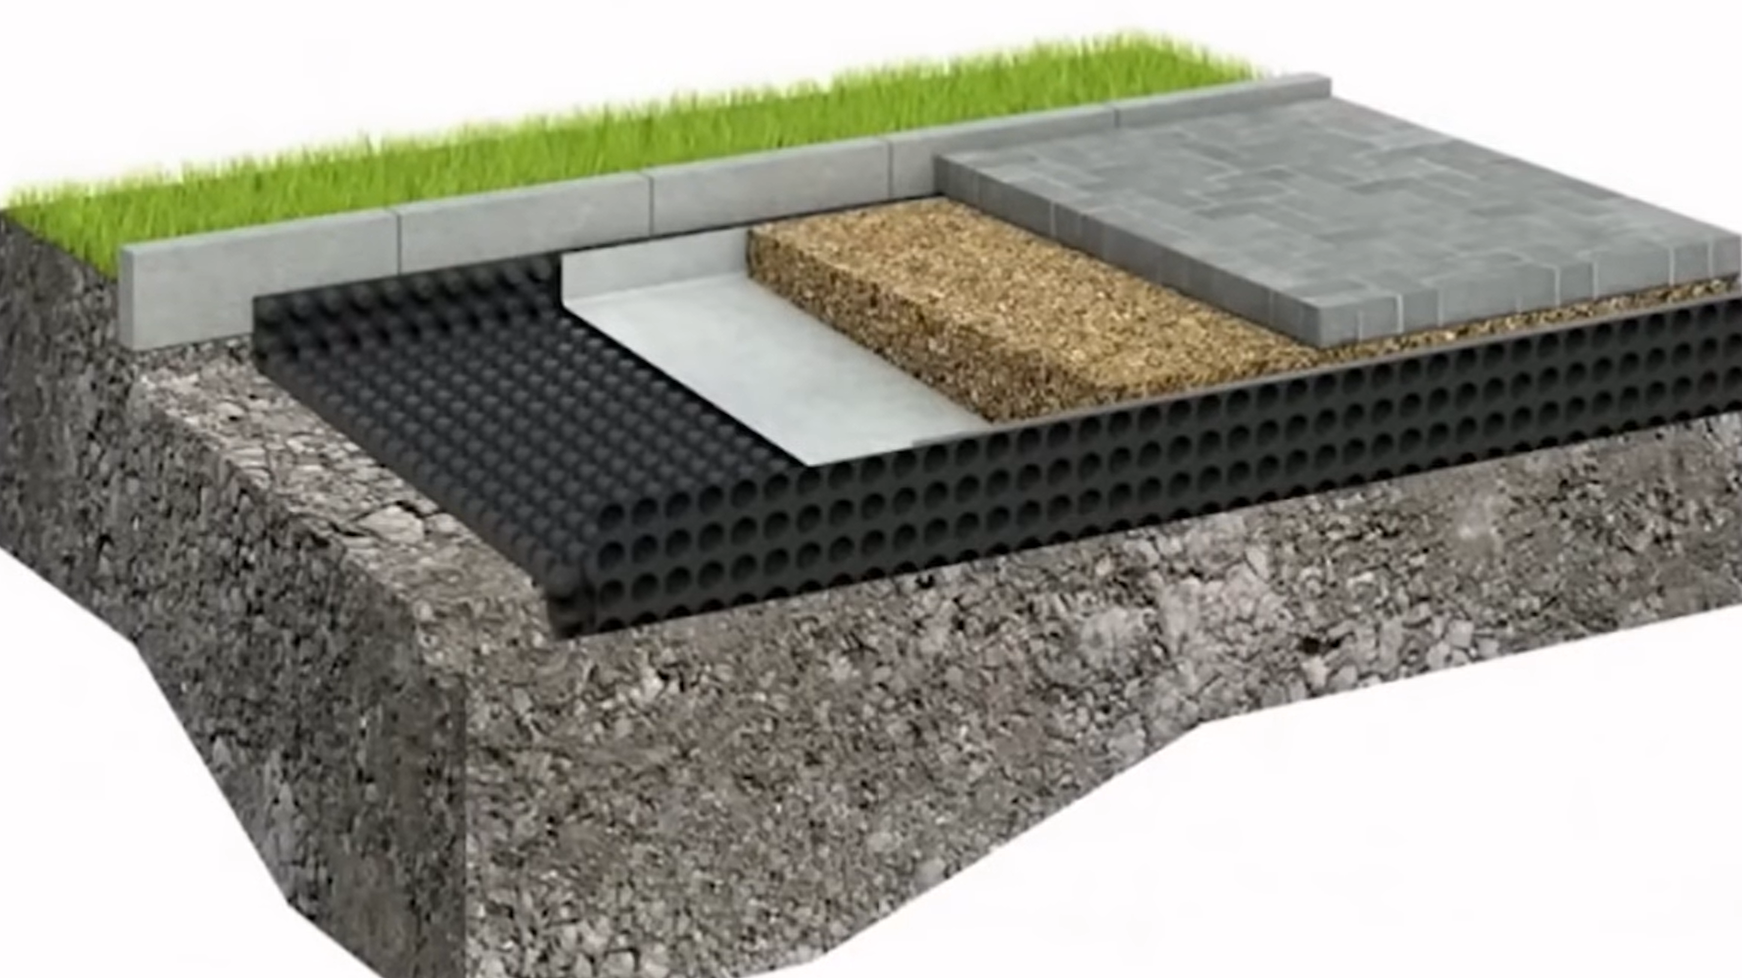
The use of spiked (profiled) membranes in road construction on private plots was long considered redundant. However, today this material has become a technological standard for those who want to build a garden path or sidewalk once and for all.
Anyone who has ever invested in paving a yard or garden paths is afraid of two things: the subsidence of the tiles in the spring and the germination of weeds through the seams, turning a neat sidewalk into an overgrown area. A traditional sand and gravel cushion does not always cope with the swelling of clay soils and groundwater. The solution that came from industrial construction is the use of a spiked (profiled) membrane.
.png)
.png)
Why does the classic «pie» of the track often collapse?
In the standard scheme (soil — crushed stone — sand — tiles) there are two weak zones:
1. Layer diffusion: Over time, heavy crushed stone literally «sinks» into soft soil (especially clay or black soil) under the influence of loads and rain. The base weakens and the tile sags.
2nd Capillary rise of water: Moisture from low-lying layers rises. When it freezes in winter, it expands (frost heave effect) and squeezes out individual tiles or entire sections of the sidewalk.
Anatomy of a benefit: what does a spinous membrane provide?
A spiked membrane is a sheet of high-density polyethylene (HDPE) with evenly spaced truncated cone-shaped protrusions (usually 8 mm high). It performs five critical functions at once:
- — Capillary rupture and ventilation: Creates an air layer between the soil and the upper layers of the base. This completely blocks the rise of moisture from below.
- — Stabilization and reinforcement: The membrane works as a rigid separator. It prevents the crushed stone from mixing with the soil, thereby increasing the load-bearing capacity of the structure several times.
- — Drainage bridge: Water that seeps through the tile seams quickly passes through the sand and gravel, rests against the membrane and flows down its relief cones into drainage ditches or the edges of the path, without lingering underfoot.
- — Absolute barrier to plants and pests: High-density polyethylene is not able to penetrate the roots of weeds or shrubs. It is also a reliable protection against moles and ants, which like to wash the sand from under the paving stones.
Step-by-step styling technology: how to do it right?
For the membrane to work 100%, it is important to follow the correct sequence of layers.
Step 1: Preparing the bed
A trench (trough) is dug 25–35 cm deep (depending on the type of tile and load). The bottom of the trench is carefully tamped. It is important to form a slight slope (1–2%) from the buildings towards the drainage for water drainage.
Step 2: Membrane flooring
The cloth is spread out along the bottom of the trench.
Which side to lay? For garden paths, the membrane is laid with the spikes facing down on the ground. In this case, the protrusions are fixed in the ground, and the formed «cups» on top are filled with crushed stone or screenings, blocking the movement of the base.
 When using a membrane with geotextile, place the side with the geotextile facing up.
Adjacent sheets are laid with an overlap (minimum 10–20 cm or 4–5 studs). For complete tightness, the seams are glued with bitumen-rubber or butyl-rubber tape. The membrane should extend onto the vertical walls of the trench to the height of the future pie.
.png)
.png)
Step 3: Creating a Rigid Base
Granite crushed stone is poured directly onto the membrane (fraction 20–40 mm for car driveways or 5–20 mm for ordinary pedestrian sidewalks). The layer of crushed stone should be at least 10–15 cm. It must be compacted with a vibrating plate. Thanks to the spikes of the membrane, the first layer of crushed stone is wedged in the grooves, creating a monolithic platform.
Step 4: Installation of geotextile (optional, but recommended)
A layer of classic needle-punched geotextile is placed on top of the crushed stone. It is needed to prevent the top installation layer of sand from sinking into the gaps between the crushed stone.
Step 5: Installation layer and paving
A layer of washed river sand or granite screenings (3–5 cm) is poured, leveled with a rule. Street tiles (paving stones or fem-elements) are laid on this layer and tapped with a rubber hammer (mallet). The seams are filled with dry clean sand.
.png)
.png)
Economic benefit: Costs now or repairs later?
Including a spiked membrane in your sidewalk estimate increases the initial material costs by about 5–10%. However, this investment pays for itself after the first harsh winter. Instead of annually re-laying individual sections of tiles that have «floated» after the snow melts, you get a stable coating that maintains its perfect geometry for decades.
